An Overview of Scrivener with Mark Eyles
The best software to write books
Reading time: 8 min
Intro
Given the success of my first interview with my good friend Mark Eyles, I decided to get him for another round of questions, this time on programmes useful for writers.
I had to start with Scrivener.
Scrivener is the legendary software created by Literature and Latte used by world-class writers and novices alike, and my personal choice of word processor.
If you’re not familiar with it, you might ask why would you pay for something that you’ve always done happily in Word.
Well, I’ll get Mark to answer this question, and, hopefully, he’ll convince you to join us on the other side.
Why did you choose Scrivener, instead of Microsoft Word?
I’ve used Microsoft Word since the 1980s and have always found it a great Word processor (apart from Clippy the paperclip). When I first heard about Scrivener, I was still using Word for all my writing. The big pitch was that Scrivener was optimised for writing books. I tried it out and bought my first copy March 2013 (I’ve still got the receipt). After using it for the past ten years I wouldn’t use any other word processing application for writing my fiction.
Remember Clippy?
There are two key things that Scrivener does supremely well, setting it head and shoulders above Word for writing fiction.
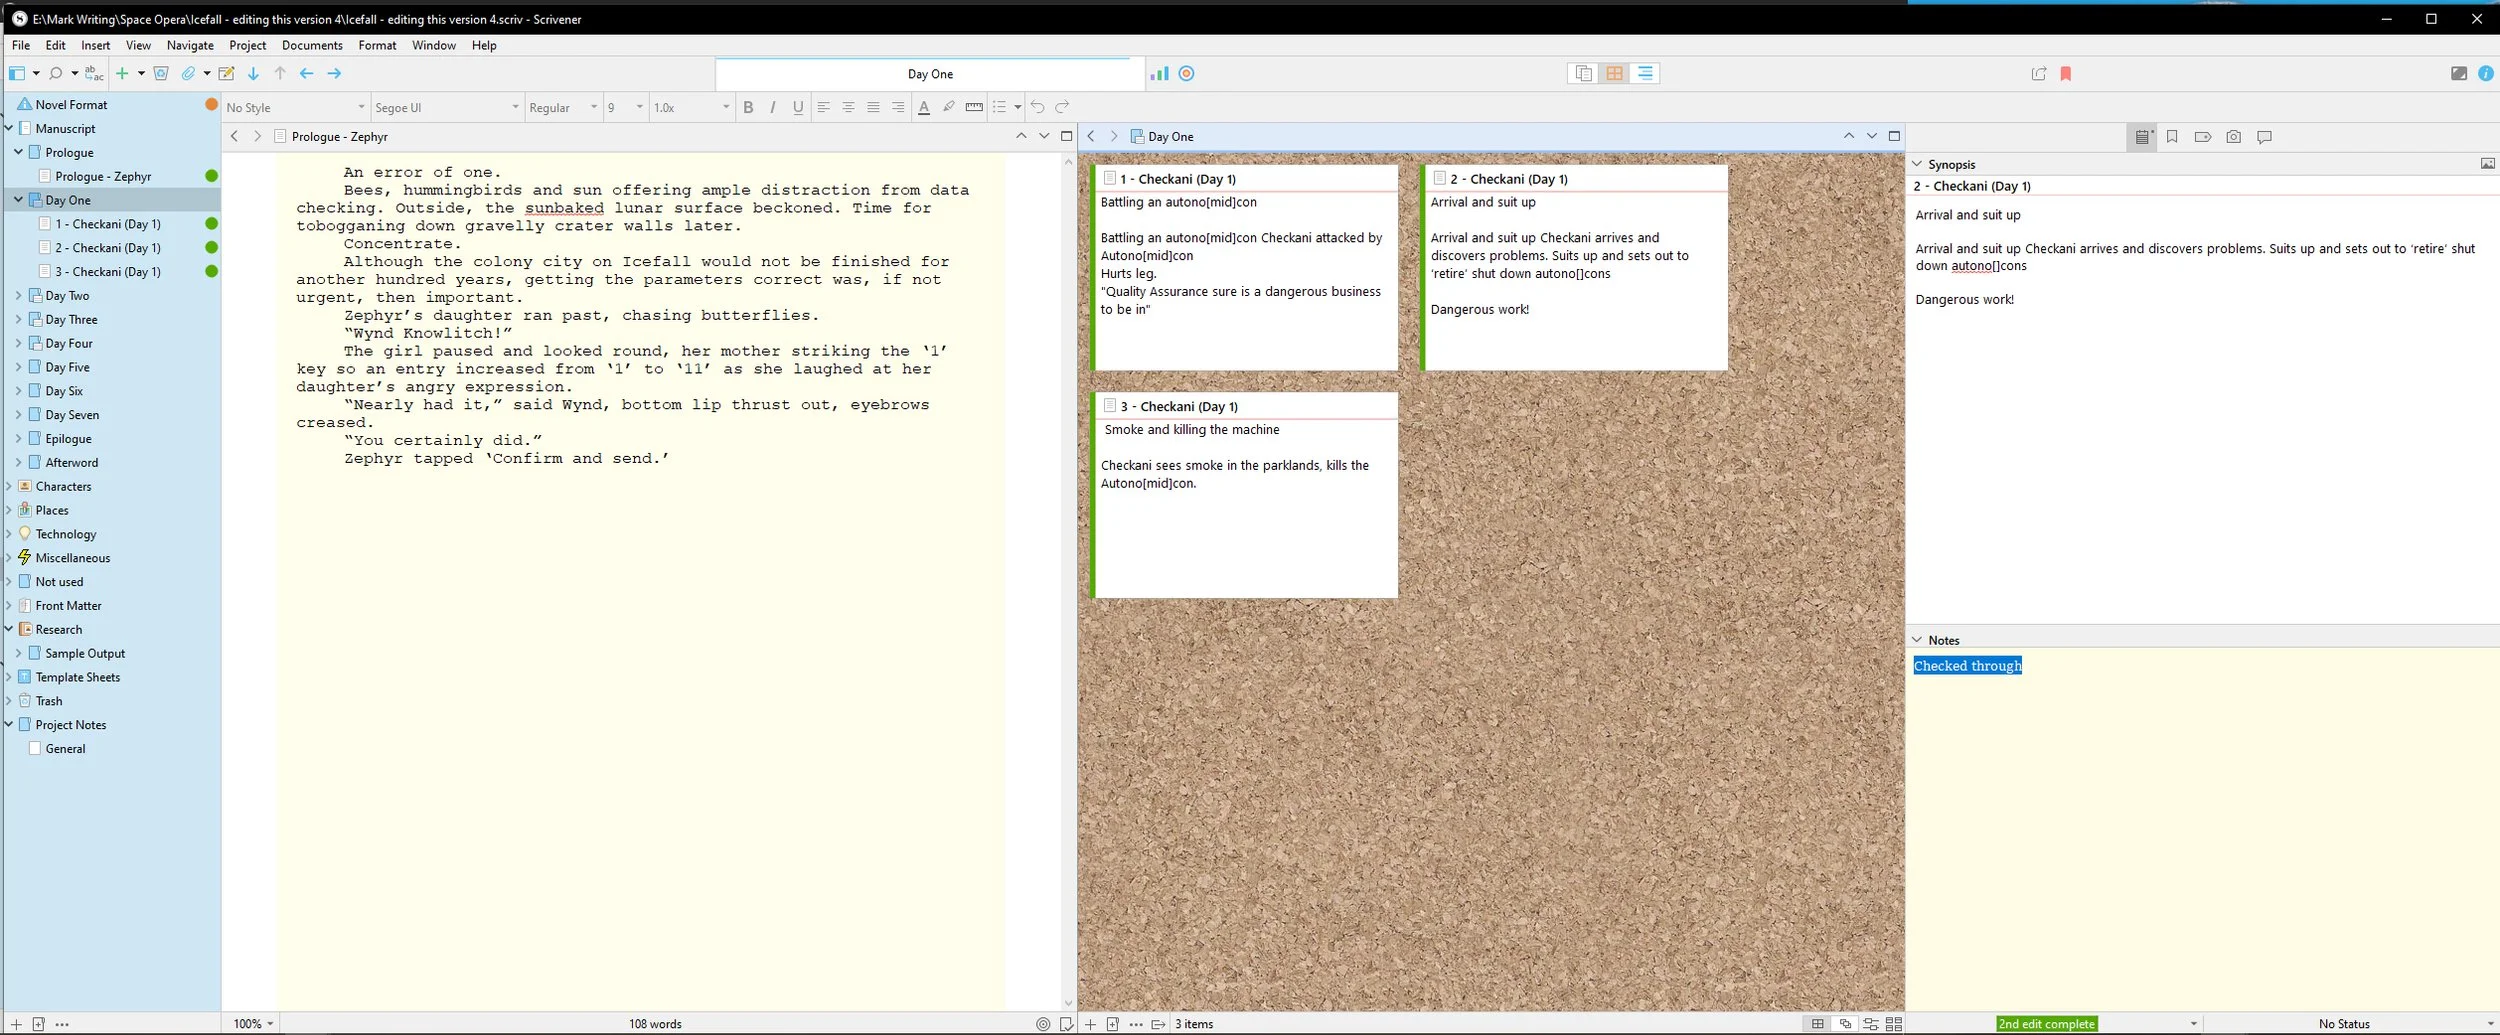
Firstly, you can have two panes open alongside each other (you can also have them open one above the other), each a unique document, or section of a document, open in it. I’m working on Chapter 2 so open it in one pane, in the other I have a Character Sketch showing. I switch the Character Sketch for a Setting Sketch, then for Chapter 1. Being able to work in one pane while displaying reference materials or other parts of the manuscript in the other is invaluable.
Multiple Panes next to each other
Secondly, there is a navigation window, Scrivener calls it the Binder, to the left of the two panes. The Binder contains all the documents that comprise the current writing project. These are organised in folders, which can be nested. For example, a Manuscript folder can contain Chapter folders, which contain scene documents. Clicking on any of the documents listed in the Binder displays it in the currently active pane.
These two features make navigating around your writing super-quick. You can flick effortlessly between different documents and sections as you write.
Word has similar features. By formatting your document correctly with Headings, you can list the contents in a Navigation pane. Clicking on the headings in the Navigation pane you can move quickly around the document. However, the links are to sections of the current document. Unlike Scrivener you cannot navigate to many different documents that do not form part of your manuscript. The navigation takes you to headings, not different self-contained sections and additional reference materials.
The Binder
Displaying two parts of a document, or two documents, is also possible in Word by splitting the document window. However, the experience of using these is not as smooth as in Scrivener. Functionally, this feature is, on the surface, similar. However, you are normally not displaying two separate documents, i.e. a reference document in one pane and a chapter in the other.
These two features sold Scrivener to me. Then once I started using it I discovered it did a whole lot more. The developers of Scrivener have optimised it for writing books. You can also use it for other types of writing, but I believe its initial focus was writing books.
When working on a project, there can be a temptation to spend money buying the perfect tools. The next step in procrastination is to expend more time learning how to use those tools. Then develop your skills – how could you possibly attempt something without first becoming an expert, or at least a talented amateur? I am always suspicious when embarking on something new. Do I have sufficient skills to tackle this? Is there any equipment I need? Anyone can start writing a book using any word processing application or even writing on paper. However, in the case of Scrivener, it really does have the functionality to improve writing. Both quantity and quality. Above and beyond this it makes the process of writing more enjoyable.
How do you personally use it?
I use it for writing books. I have also used for scripting a comic and tried it out for writing a scene of a film script. I would continue using it to write comic scripts and books. If I was serious about writing movie scripts, then I think I might look at some other applications that are optimised for this. There is no doubt that Scrivener is a powerful movie writing application, but I think there may be better ones.
For comics, there is a template that easily formats the script correctly. When you start a new project select ‘Comic Script’ in the ‘Scriptwriting’ tab. For novels, select ‘Novel’ in the ‘Fiction’ tab.
I’m going to focus on novel writing, as that’s what I use it for. I’ve written hundreds of thousands of words using Scrivener’s ‘Novel’ template. The power of Scrivener is that it can be used in different ways. Writers’ can optimise it to suit their particular way of approaching their craft. I’ve seen other writers’ manuscripts in Scrivener and they look different to mine.
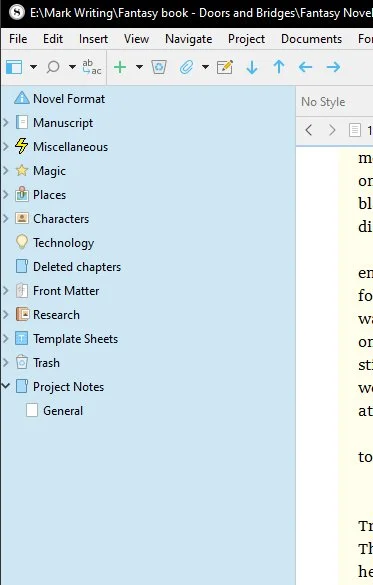
Not only do I write my novels in Scrivener, but I also use it for collecting reference materials and notes. All the notes and reference materials are stored in folders in Scrivener’s ‘Binder’ (the navigation panel at the left of the screen). As well as using Scrivener’s standard ‘Characters’, ‘Places’ and ‘Research’ folders, each of which contains template pages with themed icons, I have created my own templates for filing information. For science fiction, I have created my own ‘Technology’ folder. For fantasy, I created a ‘Magic’ themed folder. I also have a generic ‘Miscellaneous’ folder where I keep thoughts and information related to the current book.
As with other professional applications, you can customise the interface. Adding and moving buttons to the menu bar. I’ve fiddled with these, though nothing ground breaking. I added the ‘Statistics’ and ‘Project Targets’ buttons to the menu bar. Also, buttons for moving folders around in the binder. These up-down-left-right buttons can be easier to use than trying to drag-and-drop folders and files in the correct place. I frequently end up accidentally dropping files inside other ones when dragging and dropping.
Mark’s Setup
One thing I do not use, though it looks very cool, is the corkboard view. In this view, your scene files and folders are presented as file cards (with summaries/descriptions written on them) laid out on a corkboard. You can edit the descriptions and also drag and drop them to re-order your scenes and chapters.
I write with two panes open alongside each other. I write in the left one and use the other one for reference or showing other sections of the book. I have two monitors attached to my PC and drag the Scrivener window over one and a third screens. The binder and two writing panes are on the left hand monitor. An ‘Outliner’ panel containing synopsis and notes on the currently selected pane is on the right hand monitor. I always intend to be more diligent in recording things in the Outliner panel, but haven’t yet mastered this.
During the editing process I use a ‘Label’ feature to attach different coloured ‘dots’ to the files in the manuscript files in the binder. This enables me to see at a glance how far I have got in the editing process. i.e. Yellow for first draft, green for complete, etc.
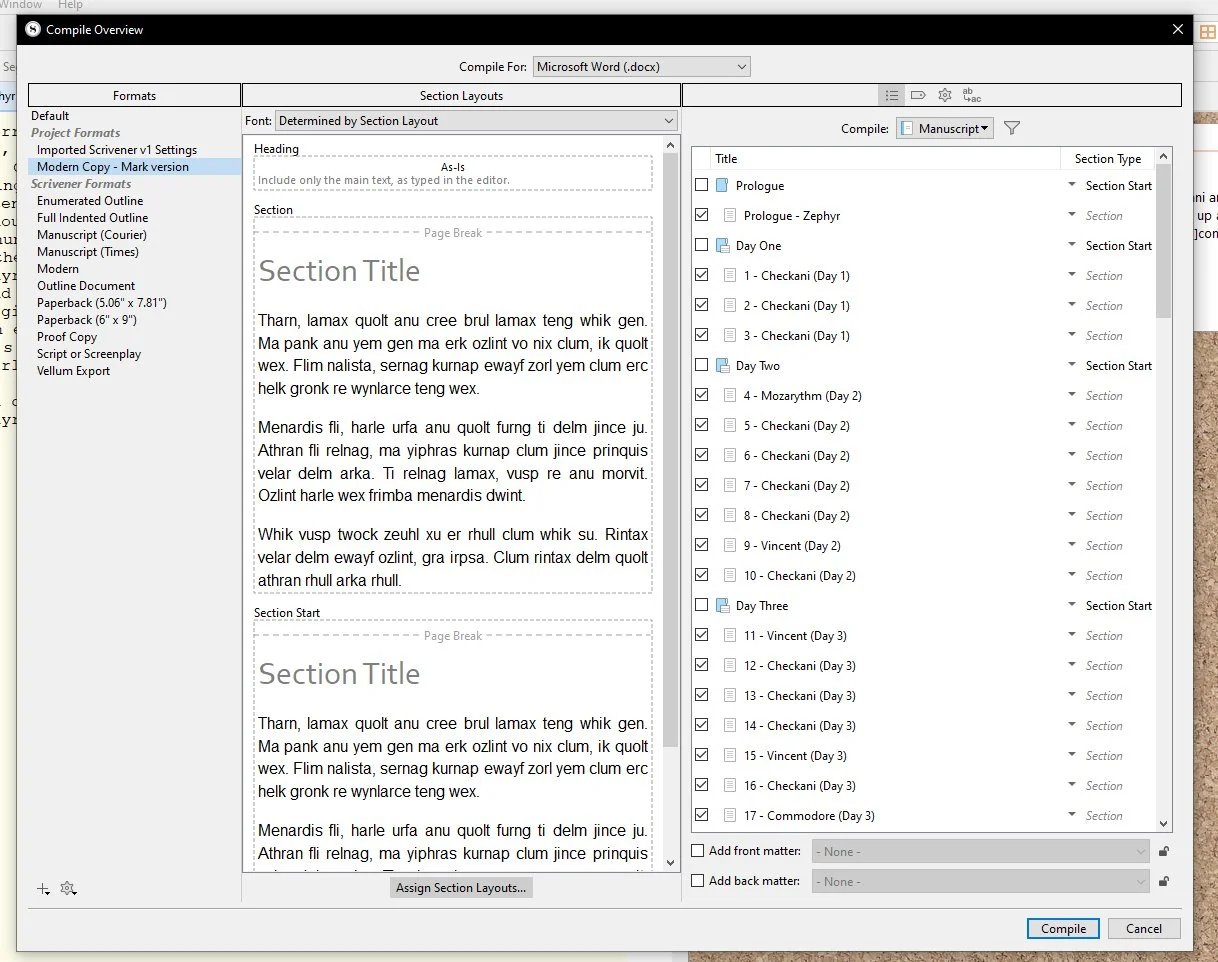
Once I have completed my manuscript, I use Scrivener’s ‘Compile’ to publish the entire book as a single file. I find Compile both powerful and a little unwieldy. When preparing a file for publishing on Amazon, I create a Word file that I can then copy into Amazon’s Word ebook and paperback templates. I am not sure how easy it is to create an ebook using Compile. It does have all the functionality you could possibly want, but always seems to require a fair bit of trial and error to output exactly what you want. I think part of the problem is that I only use Compile once a book is complete, and then only briefly to output everything I’ve written. If I was using Compile every time I did any writing, I’m sure I’d be super-proficient in using it!
The ‘Compile’ feature in Scrivener
MAC users swear by Vellum for laying out ebooks. There isn’t an equivalent for PC users, though Atticus (https://www.atticus.io/) has received some good writeups.
I use Scrivener for writing and storing research materials and notes. Not for laying out finished books.
Please consider buying Scrivener through the above affiliate link banner.
Alla Prossima


